Digital graffiti
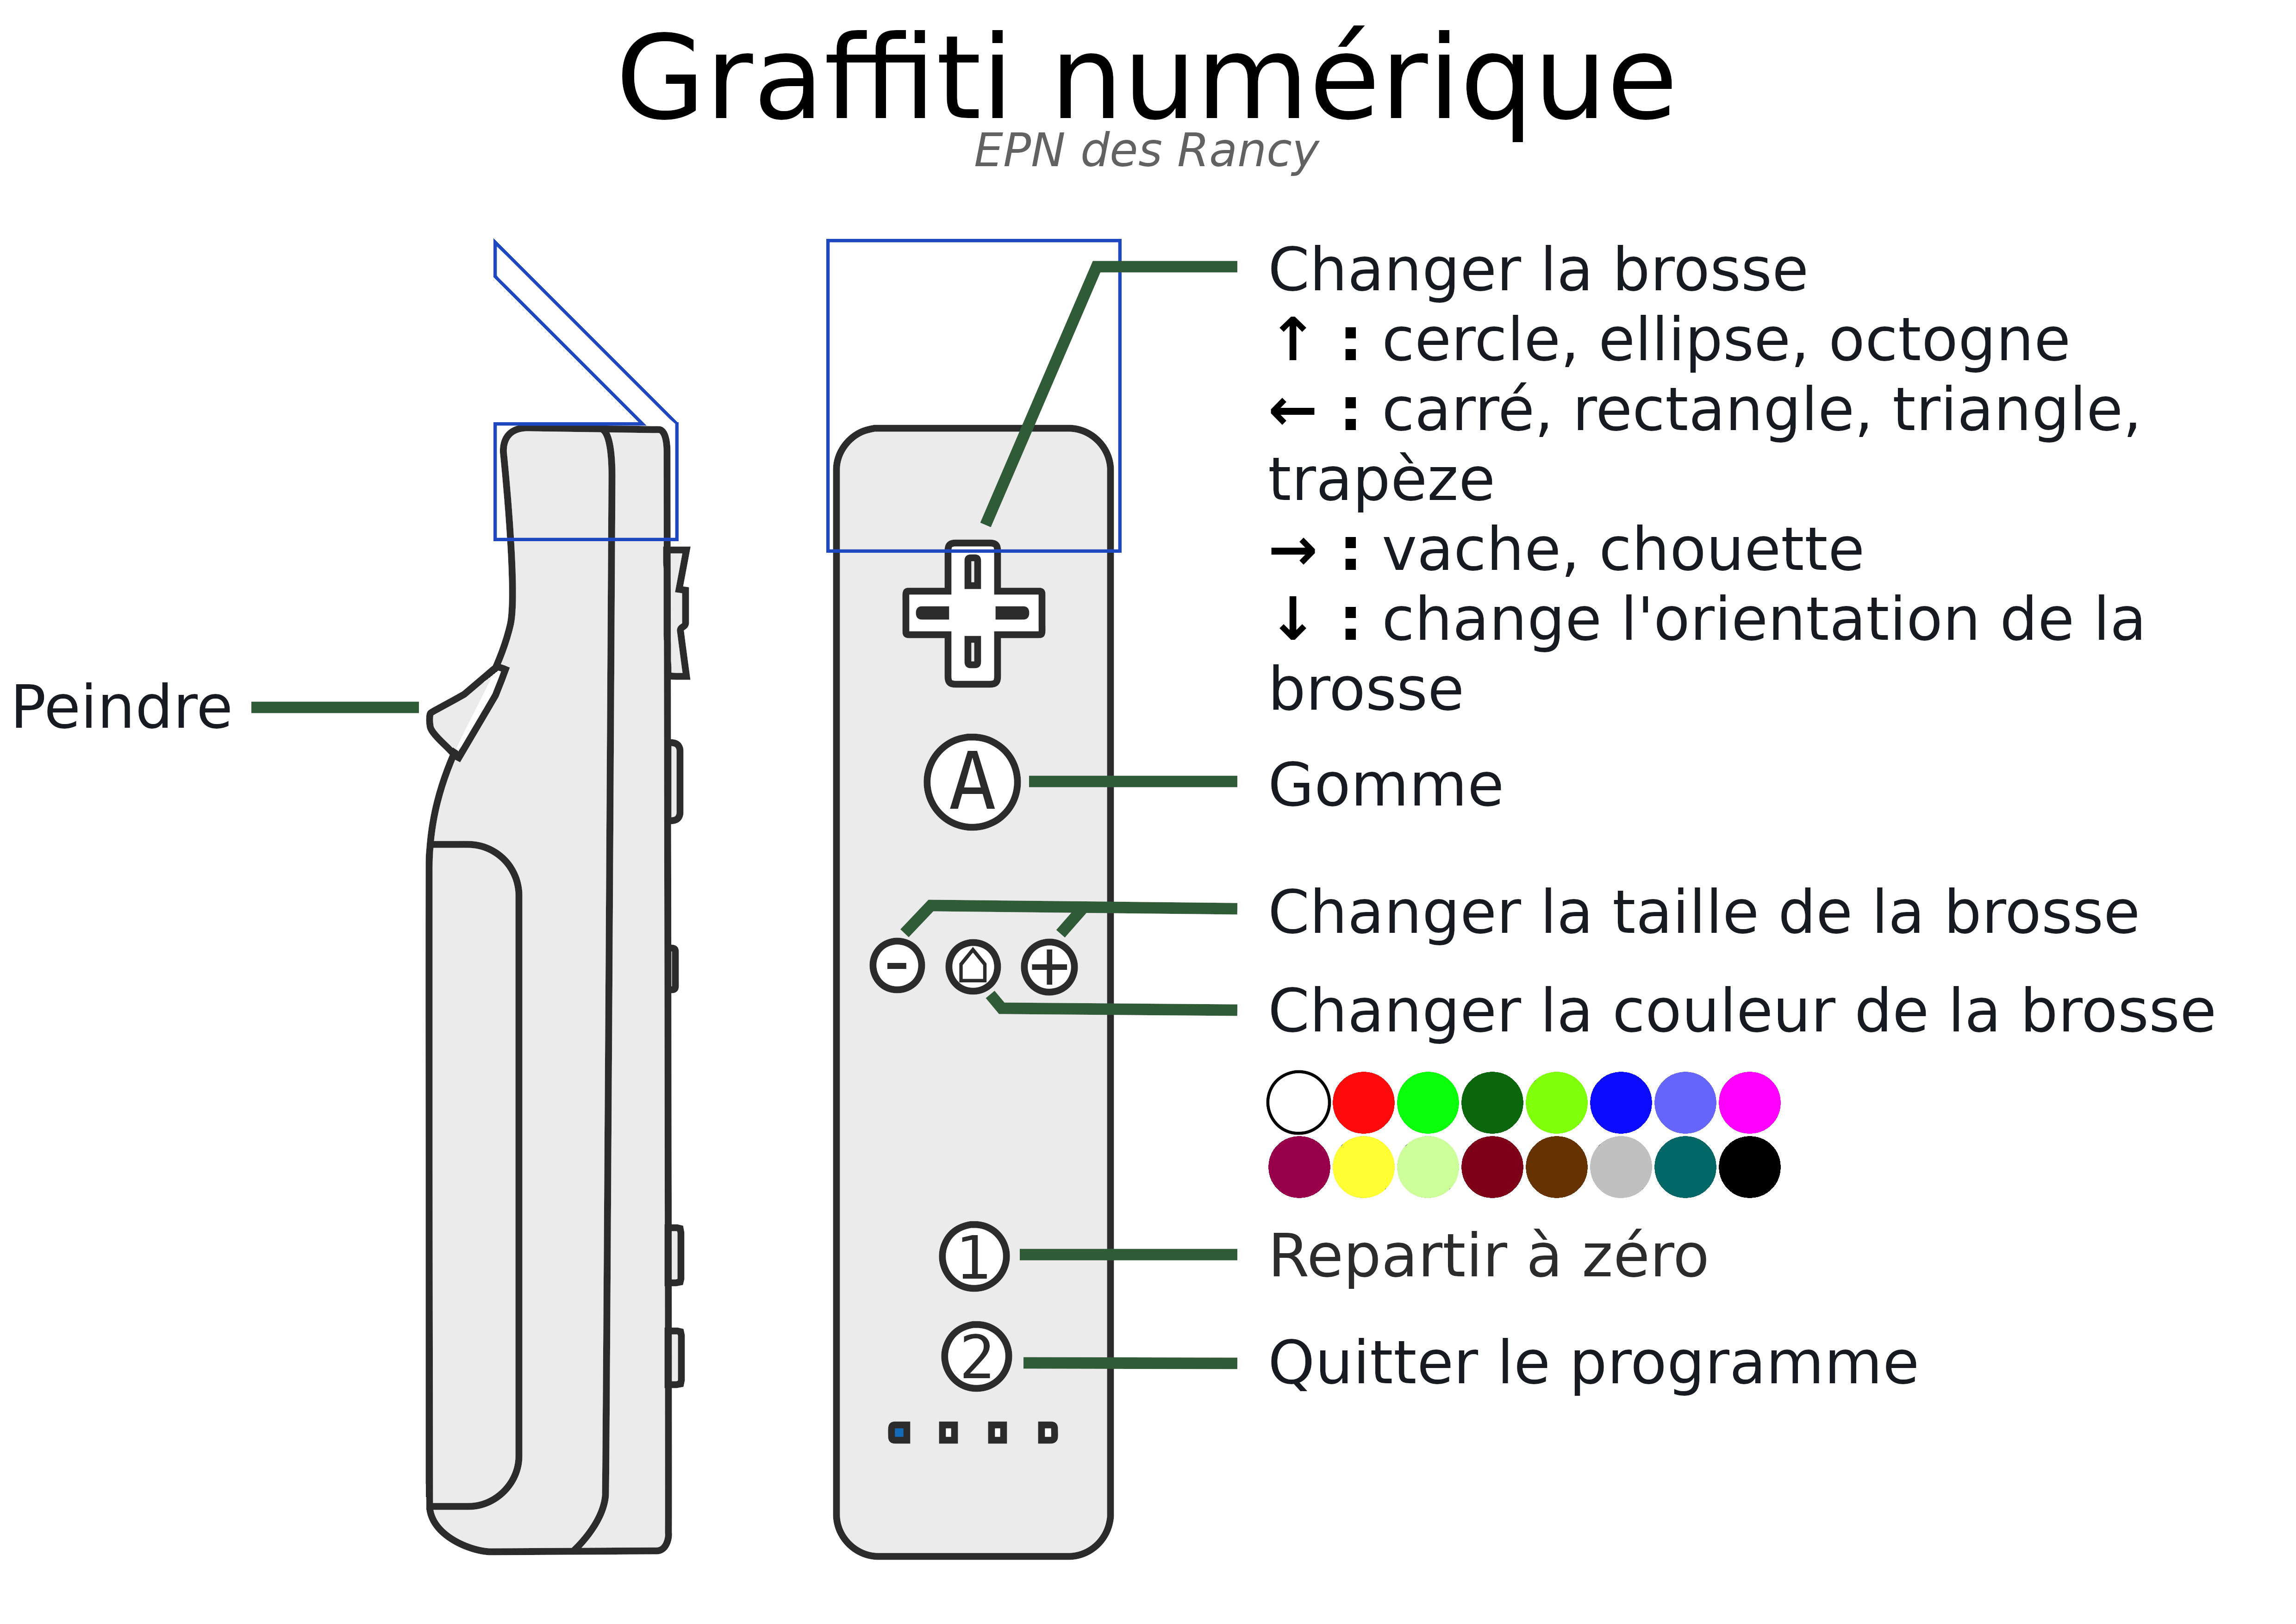
Simulating graffitis on a digital medium using a wiimote
"Digital graffiti" on https://aligot-death.space, available at https://aligot-death.space/projects/digital-graffiti-en
This project was intended as an upgrade of a project by davejavu1969, which allowed to use a wiimote as a virtual spraying can on a projected screen. We wanted to allow children of a computer-education-oriented association to paint on a wall during an event.
To do so, I upgraded the code to allow for multiple remotes (typically two, but more are possible), support different resolutions because we had various second hand video projectors (including one 1080p), and finally cleaned up the code related to calls to the cwiid library handling wiimote interactions, for easier developement.
- The page for the original project (since disappeared) is available here
- The code for the original project is (still) available here
- My code is available here
The is a relatively old project I've made a while ago. The following instructions are a weird mix of technical and non-tech savvy instructions, for archival purposes.
Installation#
Preparing the Raspberry Pi#
Flash raspbian on a SD card, and then install the following packages to interact with the wiimote(s):
sudo apt install bluetooth python-cwiid
Testing#
Check that bluetooth and the remotes are working using the following command in a terminal:
hcitool scan
And by then pressing both + and - buttons on a remote. After a few seconds, the command should terminate and display the MAC address of the remote.
Non official remotes may not work
Write down the MAC address, and start over with the second wiimote if you have one.
Launching#
Before running it#
Plug in a mouse and keyboard, as well as a video projector (A screen can be used for testing) Then, plug in the power cable to start the Pi
Finally, plug the wii sensor bar.
Starting it#
Click on the raspberry in the top left corner, and go to "accessories" > "terminal"
Type the following commands to go to the right directory and launch the program:
cd digital_graffiti/
./digital_graffiti_multi.py
As the screen displays "connecting to can", press the + and - buttons on both remotes. One of them should have its first LED turned on, indicating that it got addressed as the first remote, and the other the second LED.
If the remotes stop blinking without leaving a LED turned on, press the buttons again to try the connection process again.
Launching again#
If the program crashes or if a child close it by mistake, simply press the up arrow key to bring the command back, and press enter to launch again.
Creating a desktop shortcut#
To simplify for non tech-savvy people, you can create a simple shortcut on the desktop.
Right click on the desktop and create an empty document called graffiti_numerique.desktop
Put the following content in the file, save it, and close it:
[Desktop Entry] Name=Graffiti numerique Comment=By EPN des Rancy Inc
Icon= Exec=xxxxx Type=Application Encoding=UTF-8 Terminal=false